Renault Zoe Phase 2
Fuse box
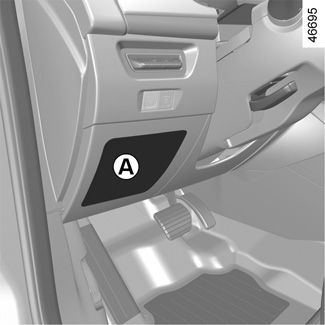
If any electrical component does not work, check the condition of the fuses.
Unclip the access flap A.
In accordance with local legislation or as a precautionary measure:
Obtain an emergency kit containing a set of spare bulbs and fuses from an approved Dealer.
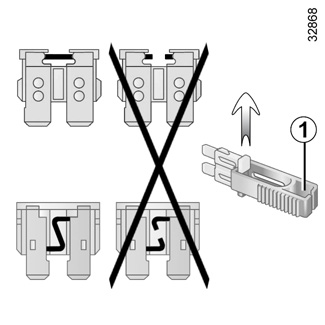
Tweezers 1
Remove the fuse using tweezers 1, located at the back of flap A.
To remove the fuse from the tweezers, slide the fuse to the side.
It is not advisable to use the free fuse locations.
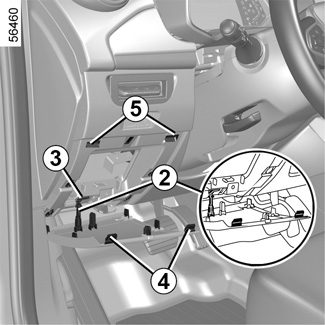
Refitting the flap A
Bring the flap A towards the dashboard. Insert the 2 component into the slot 3.
Slide the 2 component into the slot 3 towards the left, then downwards so that the clips 4 of the flap are opposite the mountings 5.
Press on the flap to clip it.
Allocation of fuses
(the presence of certain fuse depends on the vehicle equipment level)
Symbol | Allocation | ||
|---|---|---|---|
H
| Windscreen washer
| ||
î
| Multimedia accessories socket, multimedia screen
| ||
Æ
| Front cigarette lighter, front and rear second row accessories socket
| ||
Ì
| Horn
| ||
| Heated rear view mirrors
| ||
×
| Brake lights, passenger compartment central unit
| ||
| Passenger compartment centre unit, rear wiper, rear fog light
| ||
D
| Direction indicator lights, hazard warning lights, high level brake lights
| ||
| Electric window
| ||
Use the fuse allocation label in the storage compartment to identify the fuses.
Certain fuses should only be replaced by a qualified professional. These fuses are not listed on the label.
Only change the fuses represented on the label.
Check the fuse in question and replace it, if necessary, by a fuse of the same rating.
If a fuse is fitted where the rating is too high, it may cause the electrical circuit to overheat (risk of fire) in the event of an item of equipment using an excessive amount of current.